How to Edit iPhone 16 Pro Photos to Look Like Film with Dehancer

The original file was processed by clicking AUTO during RAW editing. The rest was processed using Dehancer’s Kodak Vistion3 200T film emulation.
If you're new to Dehancer Mobile for iOS, this guide is all about getting started with its built-in film presets without overcomplicating things. Instead of breaking down every tool and customization option, this article focuses on how to use the app right out of the box. You'll learn about shooting directly in Dehancer versus importing photos for post-processing, how to navigate and apply the film presets, saving and organizing your favorite looks, and exporting your final images while maintaining the film aesthetic. Whether you're looking for a quick way to enhance your mobile photos or exploring film emulation for the first time, this beginner-friendly introduction will help you dive in and start creating right away—just like I did.
In case you missed it, I go in-depth about using Dehancer to transform AI artwork from Midjourney.
1. Two Ways to Start Using Dehancer: Shoot and Edit in the App or Process Later
Dehancer gives you two different ways to approach editing your iPhone 16 Pro photos. You can either use the app’s built-in camera to take a shot and immediately apply film presets, or you can shoot with the iPhone’s native camera app and edit later in Dehancer during a dedicated post-processing session.
Both methods have their place, depending on how you like to shoot and what kind of workflow suits you best. I typically prefer the latter since I’m usually shooting street photography and don’t have time to edit on the spot. But that’s the beauty of this app — you have the flexibility to do both.
Shooting Directly in Dehancer for Instant Film Processing

Comparing the onboard iPhone 16 Pro camera to the Dehancer camera.
Dehancer offers a limited version of Apple’s native camera that lets you snap a photo within the app. Once you take the shot, you can immediately apply one of the film emulation presets and process the image on the spot.
When This Method Works Best:
You want quick results without having to dig through a batch of images later.
You're in a moment where processing is part of the fun—experimenting with looks in real-time instead of waiting.
Casual or creative shooting sessions, where you’re playing with different film styles as you go.
You don’t need Apple’s full camera features like Deep Fusion, Smart HDR, or ProRAW.
However, the downside is that Dehancer’s built-in camera is more limited than Apple’s standard camera app. You won’t get full access to manual controls, focus settings, or Apple’s advanced computational photography features.
Shooting with the iPhone Camera and Processing Later in Dehancer

The second approach is to shoot with Apple’s full camera app first, capturing everything at the highest quality possible, and then bring those images into Dehancer for a proper culling and post-processing session.
When This Method Works Best:
You want full control over image quality—shooting in ProRAW or making use of Apple’s advanced features before processing.
You’re taking multiple shots and want to select the best ones before applying edits.
You prefer to separate shooting from editing, focusing on capturing the moment first and worrying about the film look later.
You’re working in low light or high-contrast conditions, where shooting with the full iPhone camera first gives you more flexibility.
You have other images in other libraries not taken with your current phone that you’d like to edit with Dehancer.
This approach is great for professional workflows or when quality matters most, but it also means you won’t see the film effect in real-time while shooting.
Which Method Should You Use?
It depends on your intent and shooting style. If you like the idea of instant results and quick creativity, shooting directly in Dehancer makes sense. But if you want the highest quality and the ability to curate your shots, capturing first and processing later is the better approach.
Either way, Dehancer makes film emulation simple, whether you prefer an in-the-moment film look or a more controlled editing session later on.
2. Choosing the Right Dehancer Preset for Your iPhone Photos

Dehancer comes loaded with a variety of film presets, each designed to replicate the look of classic analog film stocks. Whether you want a warm, cinematic tone or a gritty black-and-white documentary feel, the app makes it easy to apply a film look instantly without manual adjustments.
Navigating the Presets
After importing a photo, the presets menu lets you scroll through different film emulations, with each one automatically adjusting color, contrast, and grain to match the look of the original film stock. Tapping a preset applies it instantly, and a long press on the image lets you compare the before-and-after view.
Making Presets Easier to Access
To keep your favorites within reach, Dehancer lets you double-tap a preset to save it in your personal collection. This makes it easier to find and apply your preferred looks without scrolling through the entire list every time.
A Fast Way to Get the Film Look
Using Dehancer’s presets means you don’t have to worry about tweaking settings—you can simply apply a film look and move on. With a variety of options covering both color and black-and-white film styles, it’s easy to experiment and find the perfect match for your photo.
3. How to Save and Organize Presets in Dehancer for Faster Editing
Once you find a preset that perfectly matches your style, saving it ensures you can apply the same film look instantly in future edits. Dehancer allows you to organize and access your favorite presets easily, making editing more efficient without having to scroll through the entire preset list each time.
Saving Your Favorite Presets
When browsing presets, double-tapping a preset automatically adds it to your favorites list. This is helpful if you find yourself using the same looks repeatedly and want quick access to them.
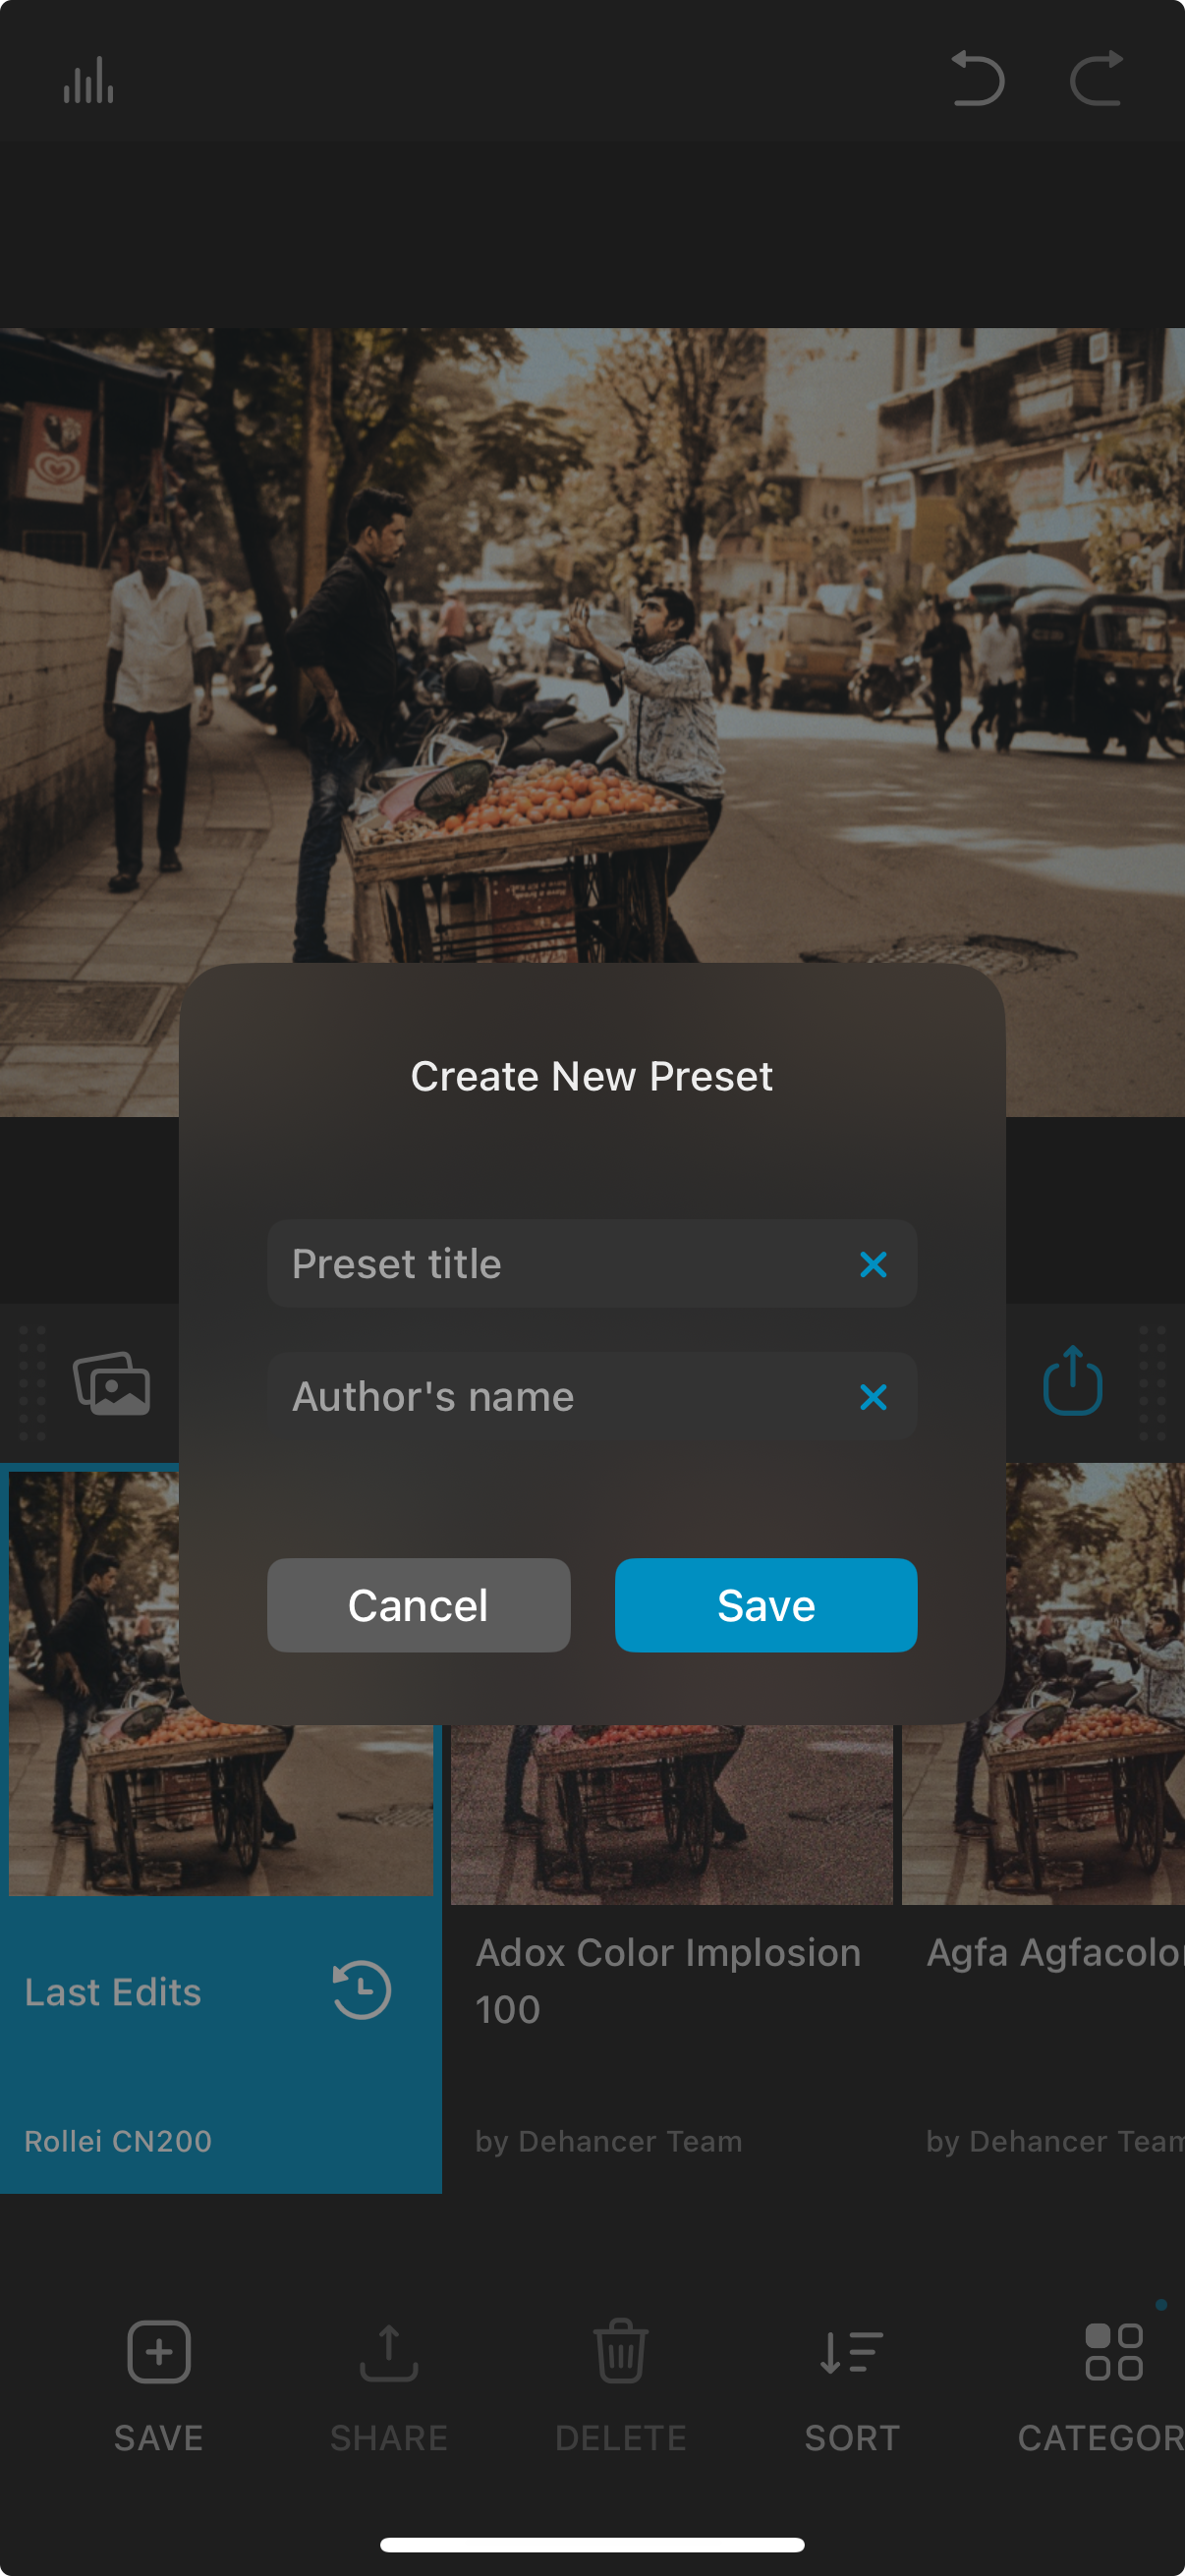
Naming and Organizing Custom Presets
Dehancer also lets you save and name your own preset combinations. If you tweak a preset slightly to fit your personal style, you can save that version as a new preset, ensuring consistency across different edits.
Sharing and Backing Up Presets
If you want to use the same presets across multiple devices or share them with others, Dehancer provides an export and import feature. This allows you to back up your presets or send them to another device without having to recreate them manually.
Why Saving Presets Speeds Up Editing
By saving and organizing presets, you create a faster, more streamlined workflow, eliminating the need to search through every film emulation each time you edit. Whether you’re going for a consistent aesthetic across your work or just want to speed up the process, saving presets in Dehancer is a simple but powerful tool.
4. How to Export Photos from Dehancer Without Losing the Film Look

Once you’ve applied your chosen film preset and are happy with the results, the final step is exporting your photo while keeping the grain, color grading, and texture intact. Dehancer provides different export options depending on whether you're saving for social media, digital viewing, or high-resolution printing.
Best Export Settings for Different Uses
For Instagram and social media, save as a JPEG with maximum quality to keep details sharp while ensuring the file size isn’t too large. Avoid excessive compression, as platforms like Instagram can degrade the image.
For print and high-resolution storage, use TIFF format if you want to retain all details and textures without compression. This is the best option if you plan to print your images professionally.
For web use and general sharing, a high-quality JPEG with reduced compression is a good balance between file size and image quality.
Avoiding Quality Loss When Exporting
Don’t oversharpen your image before export, as sharpening can interfere with Dehancer’s natural film grain.
Avoid extreme resizing, as reducing the resolution too much can make grain and fine details look unnatural.
If exporting for print, make sure your resolution is set to at least 300 dpi to preserve image quality.
Choosing the right export settings ensures that your final image keeps the film aesthetic intact, whether you're sharing online or printing your work.
5. Before & After: Applying Dehancer’s Film Presets to My iPhone Photos
While I’m using Dehancer’s presets as they are, I tend to go for a cleaner film look. I’m more interested in subtle color shifts and added grain rather than extra effects like Halation, Film Damage, or Overscan. These features can enhance the vintage feel of an image, but for my style, I prefer something that stays closer to the original while still delivering a filmic aesthetic.
For demonstration purposes in my before-and-after comparisons, I’m taking the images straight out of the camera as RAW files and applying the presets with minimal adjustments. This keeps the edits natural while still taking advantage of Dehancer’s film emulation, allowing the presets to enhance the image without overpowering it.
Straight out of camera, unedited RAW file
Fujichrome CDU-II Cross film emulation
Close up of original at 200%
Close up at 200% with film emulation applied
I just wanted to show you that there’s a lot more going on beneath the hood of these Dehancer images when you zoom in. Because if you’re viewing these on your phone, you may only see the slight color modifications without seeing the film grain. And that’s what this experience is all about — getting up close and personal with your images when converting to a film look. Straight away with little effort, this image is transformed into something that’s a lot more appealing and beautiful, at least to my eyes.
Straight out of camera, unedited RAW file
Rollei Ortho 25 film emulation
Close up of original at 200%
Close up at 200% with film emulation applied
I’m not usually a fan of the way smaller sensor cameras, like those on smartphones, handle bokeh. When you zoom in, you often notice distortions or artifacts that don’t necessarily ruin an image but don’t add anything to it either. With Dehancer’s film emulations, those issues disappear. That artificial blur is replaced with a natural, artistic grain that blends seamlessly across the image. The result feels more cohesive and is far more print-friendly.
Straight out of camera, unedited RAW file
Astrum Color Negative 125. *Edited for color enhancement.
Close up of original at 200%
Close up at 200% with film emulation applied
I wanted to demonstrate that you can still make color adjustments within the limits of Dehancer’s film emulations. In this case, I increased the color boost in both the Film Developer and Film Head settings to push the look further. That said, the best results come from editing your images before importing them into Dehancer, especially if you’re working with RAW files. Pre-editing allows you to fine-tune exposure, enhance details, and clean up distractions before applying film emulation. The goal is to start with the best possible file so that Dehancer can work with the full depth of information from your camera’s sensor.
Final Thoughts: My First Experience Using Dehancer for iPhone Film Editing
After exploring Dehancer mobile for the first time, it’s clear that the app delivers an impressive level of film emulation without requiring deep technical knowledge. The ability to apply ready-made presets, save favorite looks, and export high-quality images makes it an easy yet powerful tool for transforming iPhone photos into something that feels organic and cinematic.
While Dehancer offers a variety of customization options for those who want full control, I found that using the built-in presets was more than enough to get a great result right away. The fact that you can shoot directly in the app or import images for processing later gives flexibility depending on how you like to work.
If you’ve been looking for an easy way to bring an authentic film aesthetic to your mobile photography, Dehancer is definitely worth trying. Whether you’re just getting started or want to refine your film-style edits, it offers a simple way to create visually rich and timeless images.