I Discovered That You Can Use Generative Fill to Remove Halos and Clean Up Edges in Photoshop!

About a couple of weeks ago I discovered that apart from all the wonderful things that Generative Fill can do it can also take care of halos and smoothen edges. I’d been working on a composite when I happened upon a common problem: rough edges and halos. Let’s jump right into this and deliver on the headline and I’ll talk about the implications and my thoughts about Generative Fill afterward. Now, I’ll show you how to do it.
How to Remove Halos and Clean Up Edges in Photoshop
There’s one caveat to this method, first and foremost. You have to be okay with the original pixels being completely replaced by artificial intelligence. This may not be a big deal if we’re just talking about smoothing out edges. But it could be somewhat of an ethical concern or a strong preference not to use this method when it comes to cleaning up a subject’s hair, for example.
But without anything to hold us back, all you need is the Lasso Tool, and at current, Photoshop Beta, to remove halos and smoothen edges in Photoshop.
What I’ll do is demonstrate an easy and typical workflow for removing a background, which Photoshop makes easy with one click. Then we’ll add a Solid Color adjustment layer at the bottom of our subject so that we can see where the issues are.
Remove Background and Create a Solid Color Adjustment Layer Beneath Our Subject
Step 1. Remove the background by simply clicking on Remove Background (it doesn’t get any easier than this!).

Even with all the AI power, Photoshop still struggles removing backgrounds in images like this. The ship is completely butchered and there’s some background bleed in the woman’s hair net.

Step 2. Create a Solid Color adjustment layer from the menu in the lower-right corner of Photoshop.
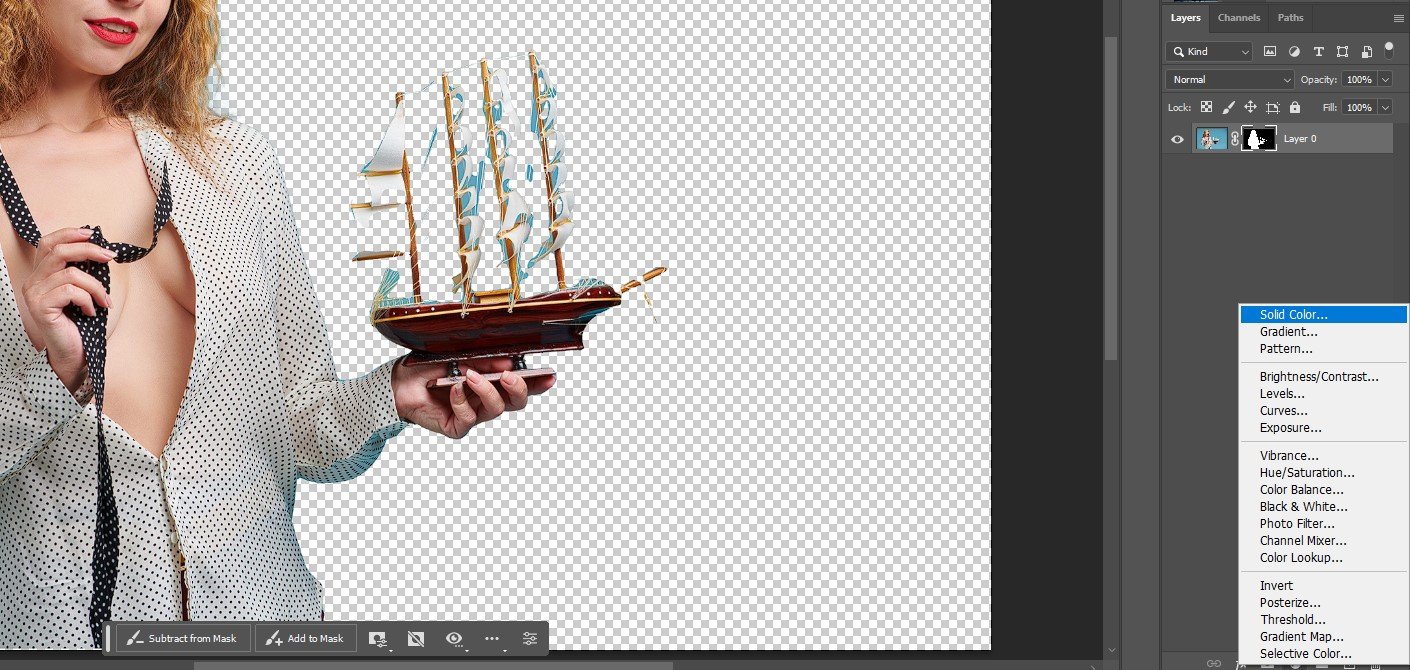
Step 3. Choose black by moving the circle to the bottom left corner of Color Picker menu and then click OK.

Step 4. Click and drag the Color Fill 1 layer so that it sits beneath Layer 0.

Now, we can see even better where the problem areas are. Let’s zoom in on the woman’s hair first.

This is where we’d use the Select and Mask option in Photoshop and go through all those tools to try to make the perfect selection. This takes time, a lot of time in some cases, and it’s not always successful in my experience.
Let’s zoom in on the edges of our subject’s shirt.

Photoshop didn’t do a bad job but we can still see some background bleed on the left. So let’s fix this!
Use the Lasso Tool and Generative Fill to Fix Edges, Hair, and Objects
Step 5. With the Lasso Tool, make a selection around the edges, including some of the fabric and background. Don’t be afraid about going too far in but you may have to experiment a bit if the results are too intrusive and move the edges too far one way or the other.

Step 6. Select the pixels layer (Layer 0) to make it active. If you forget this step, which I just did while writing this, Generative Fill won’t work at all.
Step 7. Click on Generative Fill from the floating menu bar.

Step 8. Leave the text field blank and click Generate.

Here’s the best result from the options after clicking on Generate three times. Because Photoshop Beta is super glitchy at times, you can get some strange results, like objects added, which was what happened first. But on the second click on Generate I was able to smooth over the edges.

Step 9. Now, let’s use the Lasso Tool again and make a selection of the woman’s hair and net. Since we don’t have an issue with the original pixels being replaced in this scenario, we’ll be sure to select all the background leftover colors.

Steps 9 - 10. Click Generative Fill and then Generate. The results are truly amazing given the complexity of the task.

No more background bleed, no more janky edges. The hair and hat pixels have been completely replaced and match the existing colors. There’s no way that Select and Mask could have pulled off this kind of effect, let alone in a matter of seconds!
All told the edges, hair, and even the stupid ship could all be fixed in five minutes or less.
What About That Stupid Ship?
Once more, we’re dealing with personal preferences or client briefs perhaps. But if details like the boat don’t need to be preserved with Photoshop’s traditional tool set, then we can either fix or remove the ship in seconds.
No Ship

New Ship

We can even use Generative Fill to change the wardrobe to something more conservative for the faint of heart.

AI Is the New Era and It’s Already Here
Generative Fill for corrective and creative editing in Photoshop is a boon for me. I’m not sure what’s going to happen when Adobe takes this feature out of Beta and includes it with regular Photoshop. There are rumors about additional fees for using the service since the generated pixels are being lifted from Adobe Stock images. I think regardless of how it’s handled, there are going to be millions of artists who jump on board and pay the price. The technology is just too good to pass up.
So I hope you found some value in my little discovery. I was so thrilled that I discovered yet another valuable use for Generative Fill that nobody has talked about previously. And I’m constantly seeing new uses for Generative Fill demonstrated almost daily by the Photoshop gurus of YouTube. This is truly an exciting time to be an image-maker.
I have written about Generative Fill at MUO.com. Here are those articles in case you’re new to the feature.
Join Me in One of My Fine Art Street Photography Workshops
I’m running a series of 3-day photography workshops around the world in 2023-2024 that focus on creating fine art from your street photography. I cover a lot of the post-processing along the way and in follow-up Zoom sessions. Check them out if you want to elevate your street photography and create art to print.