How to Edit Black and White Images Like a Pro With Luminar Neo

Luminar Neo is billed as a creative photo editor. I'm on board with this definition because all the heavy lifting I still do in Photoshop. And primarily, I use Luminar Neo as a plugin with Photoshop. But for black and white images, I feel that Luminar Neo can handle the vast majority of my black and white work and I wouldn't miss Photoshop at all. That's because apart from the artificial intelligence technology built-in to Luminar Neo, which makes it a joy to work in creative ways quickly and effectively, there's also a Raw file developer module that can handle many of the basic and advanced edits.
I'd like to clarify the title of this piece before I move on to show you how I edited a Raw file from a street photography outing in Mumbai recently. If I'm going to invoke "Pro" in the title, it's with professional photographers in mind. To me, that means:
- I shoot and edit in Raw
- I'm gearing this article to actual professionals and serious hobbyists whose work could pass as professional
- I'm always looking for ways to improve my craft
In other words, I'm not using pro as a buzz word, I'm using it because I mean it. I'm a pro and I hope you're positioned or aspiriing to be in that camp too.
Why I Began Using Luminar Neo to Edit My Black and White Images
I recently uninstalled my licensed copy of the Nik Collection. In that suite of software is DxO’s black and white editor, Silver Efex Pro. I’d been using this for many of my black and white conversions over the years but came to the realization that I never used it anymore. I’m not going to make this a hit piece against DxO, I’m just stating my opinion: I feel that the incremental improvements of subsequent versions of the Nik Collection were not warranting the price of upgrading nor were the innovations all that exciting. I knew my days of using their software were numbered when their Nik Collection 5 upgrade didn’t inspire me at all to make a move in that direction. And around this time, Skylum had put out Luminar AI, which I eagerly signed up to get the prerelease version and subsequently did the same with Luminar Neo.
So what sets Luminar Neo apart from Silver Efex Pro? A few highlights.
Layers
Raw photo editor
100% AI processing core
The ability to create presets
Additional plugins like Sharpen AI
One-touch sliders like Enhance AI that produce dramatic results
Built-in pro features like the Clone Stamp tool and Dodge and Burn (you can use Curves for this too)
There are more on the list and I’ll cover some of these too as they come up in my black and white workflow. This isn’t meant to be a compare and contrast piece with Silver Efex Pro but merely some of my background story as to why I gravitated to Luminar Neo for black and white processing. I have friends who still swear by Silver Efex Pro and that’s great. It’s all about finding the right tool for yourself.
My Workflow Using Luminar Neo (Non-Black and White)

I already mentioned that I use Luminar Neo primarily as a plugin for Photoshop. That’s because I’ve got different kinds of images that needed varying degrees of advanced selections and controls, especially when I’m working on images that will end up as limited edition fine art prints. I may write a detailed piece about how I use Luminar Neo as a plugin later, but for now it’s good enough to know that much of my street photography and artwork begin in Lightroom and Photoshop. Here’s a typical workflow that covers probably 90% of my non-black and white workflow.
Import into Lightroom
Basic edits, including any initial selections, in Lightroom
Export to Photoshop as a Smart Object
Any cleanup work requiring the Clone Stamp Tool, Healing brushes, Patch Tool, or Content Aware Fill work
Edits in Luminar Neo. I may save the settings as a preset if I have two or more images from the same batch that could benefit
Import back into Photoshop
I may continue editing in Photoshop. For instance, maybe I needed a Stamp Visible layer created, which Luminar Neo can’t do of this writing
If needed, I’ll return back to Luminar Neo for additional touches
Color correction
Export files for sharing and saving
The goal is to have a PSD file with multiple layers, including any layers where Luminar Neo had been used.
I include this section as a reference because in the next section, I’ll cover my workflow from start to finish using Luminar Neo as the only photo editor for a black and white image. I want to illustrate that despite some limitations, Luminar Neo can be used as a primary photo editor if you shoot a lot of black and white, and that it will do a more professional job than other standalone apps on the market dedicated to black and white processing, however few in number this may be. On that note, I’ll add that street photographers would likely find the next section extremely interesting if they’ve never used Luminar Neo before.
How I Edit My Black and White Images Using Only Luminar Neo

Now, I’ll walk you through my black and white workflow using Luminar Neo. I’m not going to spend any time discussing the Catalog and the nitty gritty of organization features and peripheral functions, I’m just going to focus on editing the image, which is of this kid riding a bicycle along a Mumbai street.
I haven’t done a full practice edit with this image, so I’ll share the steps that I normally follow if I were editing this for the first time. Let’s start things off with a complaint to Luminar Neo: you don’t have a profile for the Sony ZV-1 yet? I know it’s marketed to vloggers and video content creators, but the camera is really a secret weapon for street photographers looking for a compact mirrorless camera that’s pocketable (even with a grip extension) and doesn’t cost over a thousand bucks.

But I’m not quick to lay blame with Skylum since even Adobe doesn’t have the ZV-1 profile in its Camera Raw or Lightroom. And whenever you buy a new camera on the market, don’t expect any camera profile updates for a while. But as expected from any professional photo editor, you should be able to tame the lens distortion. And you can with Luminar Neo.
Step 1: Fix Lens Distortion

I don’t always need to start with this step but since I was shooting at 24mm, there’s some serious barrel distortion happening. To start, I simply click on the Edit tab, scroll down to Essentials, and find Optics. Then I check the Auto Distortion Corrections box.

That removed a fair amount of the distortion. But I can make more improvements by pushing the Lens Distortion slider to the right.

I’m sure it’s not perfect but it looks pretty damned good to me. A lot better than the starting point! No lens profile needed.
Step 2: Cropping

I shoot a lot of street photography. The very nature of the genre requires cropping most of the time in my experience. I divide the genre theoretically into two halves. The first half I call Chasing Moments. This is probably what a majority of street photographers do - they attempt to capture the moment as it happens, as opposed to “fishing” or “camping out”, whatever term you want to use for when you’ve got a frame lined up and you’re just waiting for someone to walk through it. Since I love chasing moments with my camera on and in hand at all times, the prospect of cropping in post is almost a given. My frame is seldom perfect.
So I’ll use Luminar Neo’s suggest for this image by going into Crop AI and clicking on Composition AI. Note that this option is only available when you’re using Luminar Neo as a standalone app. It’s not an available feature if you use it as a plugin.

Composition AI lined everything up using the Rule of Thirds, which works great for this image. Now, I just click Apply and move onto the next step.
Step 3: Convert to Black and White

To convert to black and white, I go to Essentials and click Black and White. Next, I click Convert to B&W.
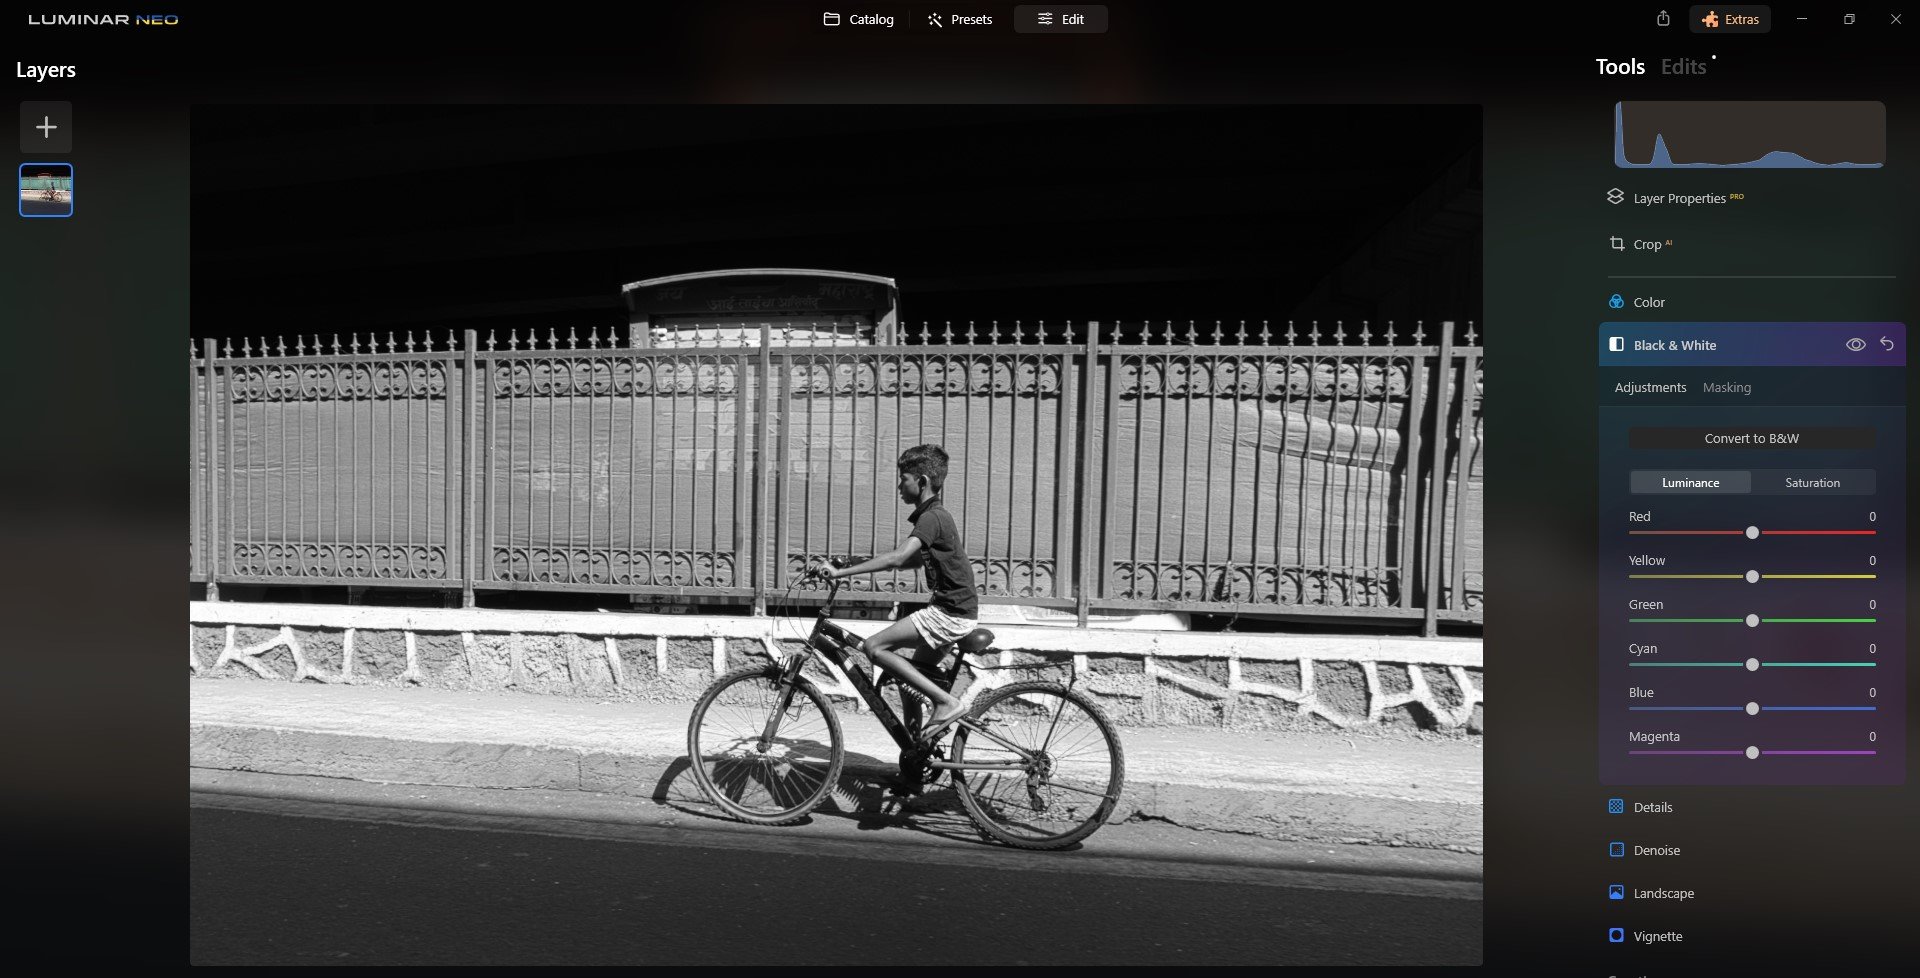
I could have made this one of my first steps in the workflow but I always feel that cropping comes first. Just a personal preference.
The next step in the black and white process is to adjust the Luminance sliders. My goal here is that subject should stand out from the background as much as possible. So I don’t want this boy’s shirt and skin to feature as prominently as possible.

I find there’s usually a “hero slider” that has the greatest effect. In this image, the Blue slider darkened the boy’s shirt for a stronger presence. And though I pushed the Yellow and Red sliders a bit, they didn’t play a big role in changing the over dynamic that much.
Step 4: Enhance AI

No matter what I’m editing in Luminar Neo, I always check in with the Enhance AI slider to see what it can do for my image. I use it so much that I’ve favorited the feature so that it sits on top of the tools. Now, I just push the slider all the way to 100 to see what it does. Then I’ll typically dial it back, especially if I’m working in color. But for this image, I leave it maxed out.

Because there’s no color in this image, Enhance AI attempts to make exposure and contrast adjustments. There’s a subtle effect in the middle of the screen but the shadow areas in the foreground and background are being lifted. I don’t want that. So next I’ll go into Masking and paint out these areas using Brush. Then I click Erase to fine-tune the mask.

Basically, I’m erasing the red mask from the top and bottom of the image because later on I’m going to darken these areas even more.
Step 5: Develop Tools

The Develop tools in Essentials is one of the feature sets that separate Luminar Neo from basic creative photo editors that rely heavily on filters and smartphone-esque gimmicks. Here, you’ll find many of the basic tools that you’ll have in Lightroom and Adobe Camera Raw. And since I’m working with a Raw file, I’m going to make use of these tools the best I can to make this black and white image pop.
I’ll first experiment with the Light and Blacks and Whites sliders.

The image is definitely more punchy with these adjustments. I tend to be more conservative with these sliders because I want to save some of the workload for Curves, where I’ll not only boost the contrast but also, with the help of Masking, completely darken the foreground and background.
But to use Curves the way that I want to, I have to click on the Develop module to close it out and then go back in so that my initial adjustments are saved. Now, I can use Curves and Masking to sculpt the image.

This doesn’t look pretty now, but what I’ve effectively done is turn the foreground and background black. Perfect. Now, I just need to go into Masking and remove the heavy effect from the rest of the image. Once again, I’ll use Brush and Erase to make it happen.

This is another feature that I think many street photographers would love, especially those who like to create super-crunchy black and whites with a lot of negative space.

I think the image looks great so far. But I don’t stop here. There’s still many tools to consult to make this black and white really stand out.
Step 6: Structure AI

What’s a black and white image without a structure boost? I use Structure in all my black and white images.

It may be difficult to see the effects in a screenshot, but Structure has revealed a lot more detail in the midtones. Like with Curves, some of that detail is bleeding through in the dark regions. I’ll mask this out again using the same steps as before in Masking. I’ll skip these screenshot results and we’ll carry on with the next step.
Step 7: Details

Details stands among my favorite features in Luminar Neo because the results are always transformative. These sliders seldom need to be pushed very far to achieve fantastic results. My usual formula is to increase the Small Details slider the furthest the others, including Sharpen, rarely are increased more.
It’s difficult to tell from the screenshots, so I’ll zoom in to just over 50% to show a Before and After.
Before

After
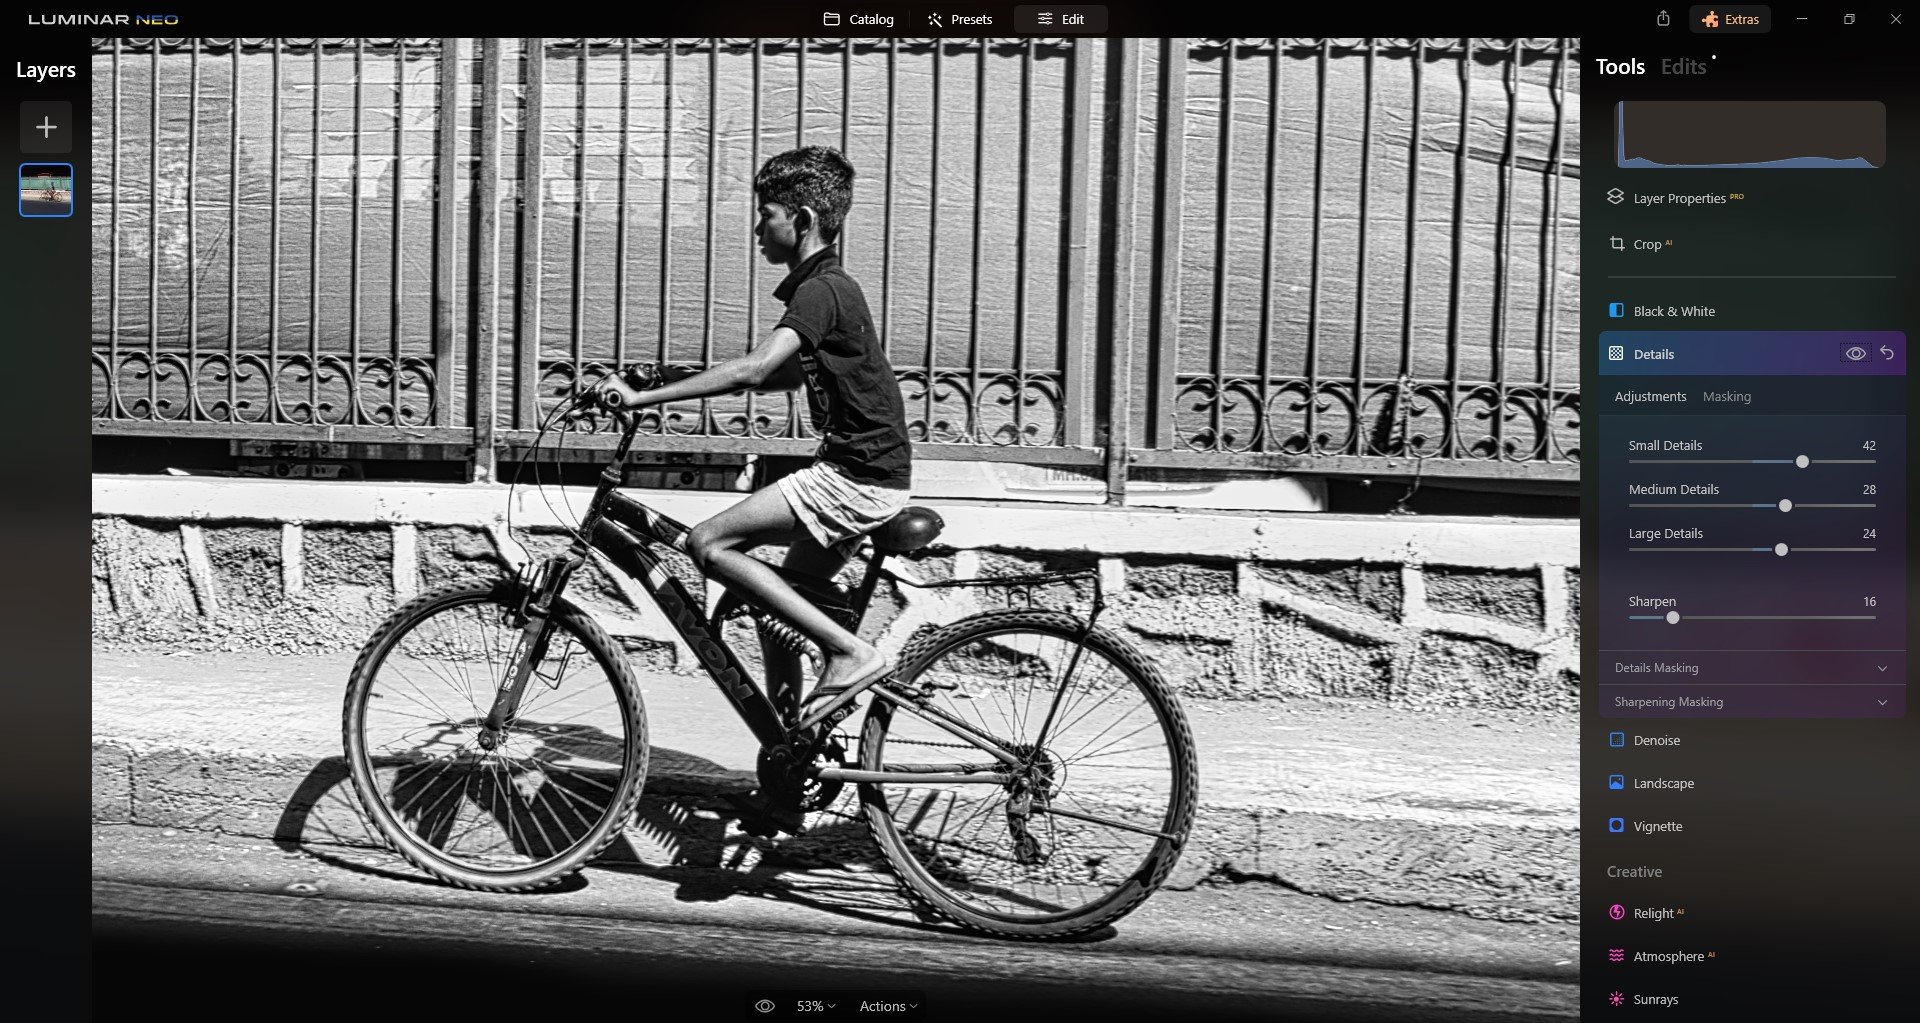
At this point, I’d do masking if necessary. But for this image, the extra crunchiness works for me.
Step 8: Supercontrast

No matter the subject, I’ll always use Supercontrast to see if I can better the image. Unless I’m going to add additional image layers, textures, or lighting effects, this will be my typical last step for a straight up black and white image. It’s also my last step for most color images I edit.

Once again, the screenshot doesn’t do this justice but I also don’t tend to push these sliders too far. It’s a great finishing feature to even out my tones.
Step 9: Create a Preset (Optional)

I mention the Presets option for those who may have multiple images from a shoot that could benefit from the same edits. Street photographers, I believe, will love this feature because they can create custom presets that they can use to establish their style. Working photographers will find this feature essential for dealing with large batches, especially wedding photographers.
All I do to create a Preset is click on Actions at the bottom and then Save as Preset.
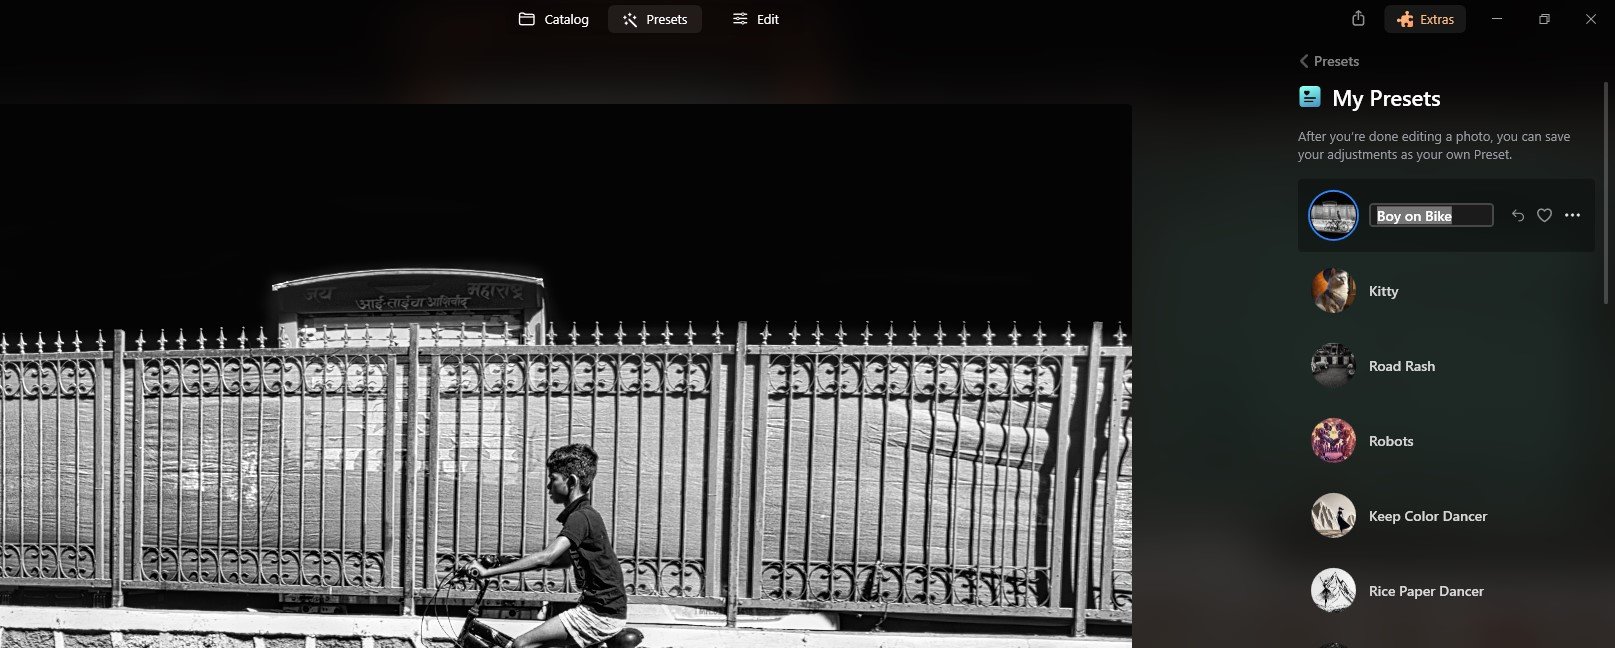
Then I just name the preset and that’s it.
Step 10: Exporting Images in Luminar Neo

The last step is to export the image for my website, social media, or for storage. The Share to icon at the top houses the option to share to a folder or mail.

A standard export dialogue menu allows you the usual options to export as a JPEG, PNG, TIFF, JPEG-2000, or a PDF file.
That’s a Wrap!
And that is how I edit my black and white images like a pro using Luminar Neo as a standalone application. If you have any questions or comments, feel free to comment below or send me a message from my Contact page.
You can purchase Luminar Neo using my affiliate link. The price is the same but I get a small commission.