How I Change Backgrounds in My Photo Retouching
When you hire a retoucher, you want realistic background replacements.

Photographer: Sue Bryce Retoucher: Craig BoehmanIt's very common to receive requests from clients to remove or completely change the backgrounds when I'm retouching their images. Sometimes they inform me in advance but oftentimes requests like this come in spur-of-the-moment once the client is happy but then seeks more value to make use of their images.
Removing backgrounds is usually the easy part. It's pretty much Photo Editing 101 for any retoucher with any experience. But it becomes a different story when you try to match a background that looks realistic. This is the point where photo retouchers start to earn their money. This is basically compositing, where you must consider the light, color, exposure values, shadows, and any number of other elements that may make the subject or the background conflict with one another if not handled properly.
In this article, I'm going to discuss considerations of photo retouching in relation to replacing backgrounds. I'll be using the same image to demonstrate a few common requests that vary in how a retoucher approaches the composite. For these examples, I'll be using an ideal setting: the photographer photographed the subject against a gray background. This is the ideal professional setup for many reasons, one of which is for replacing backgrounds for editorial and commercial retouching purposes later on.
Replacing the Existing Background with a Clean Version
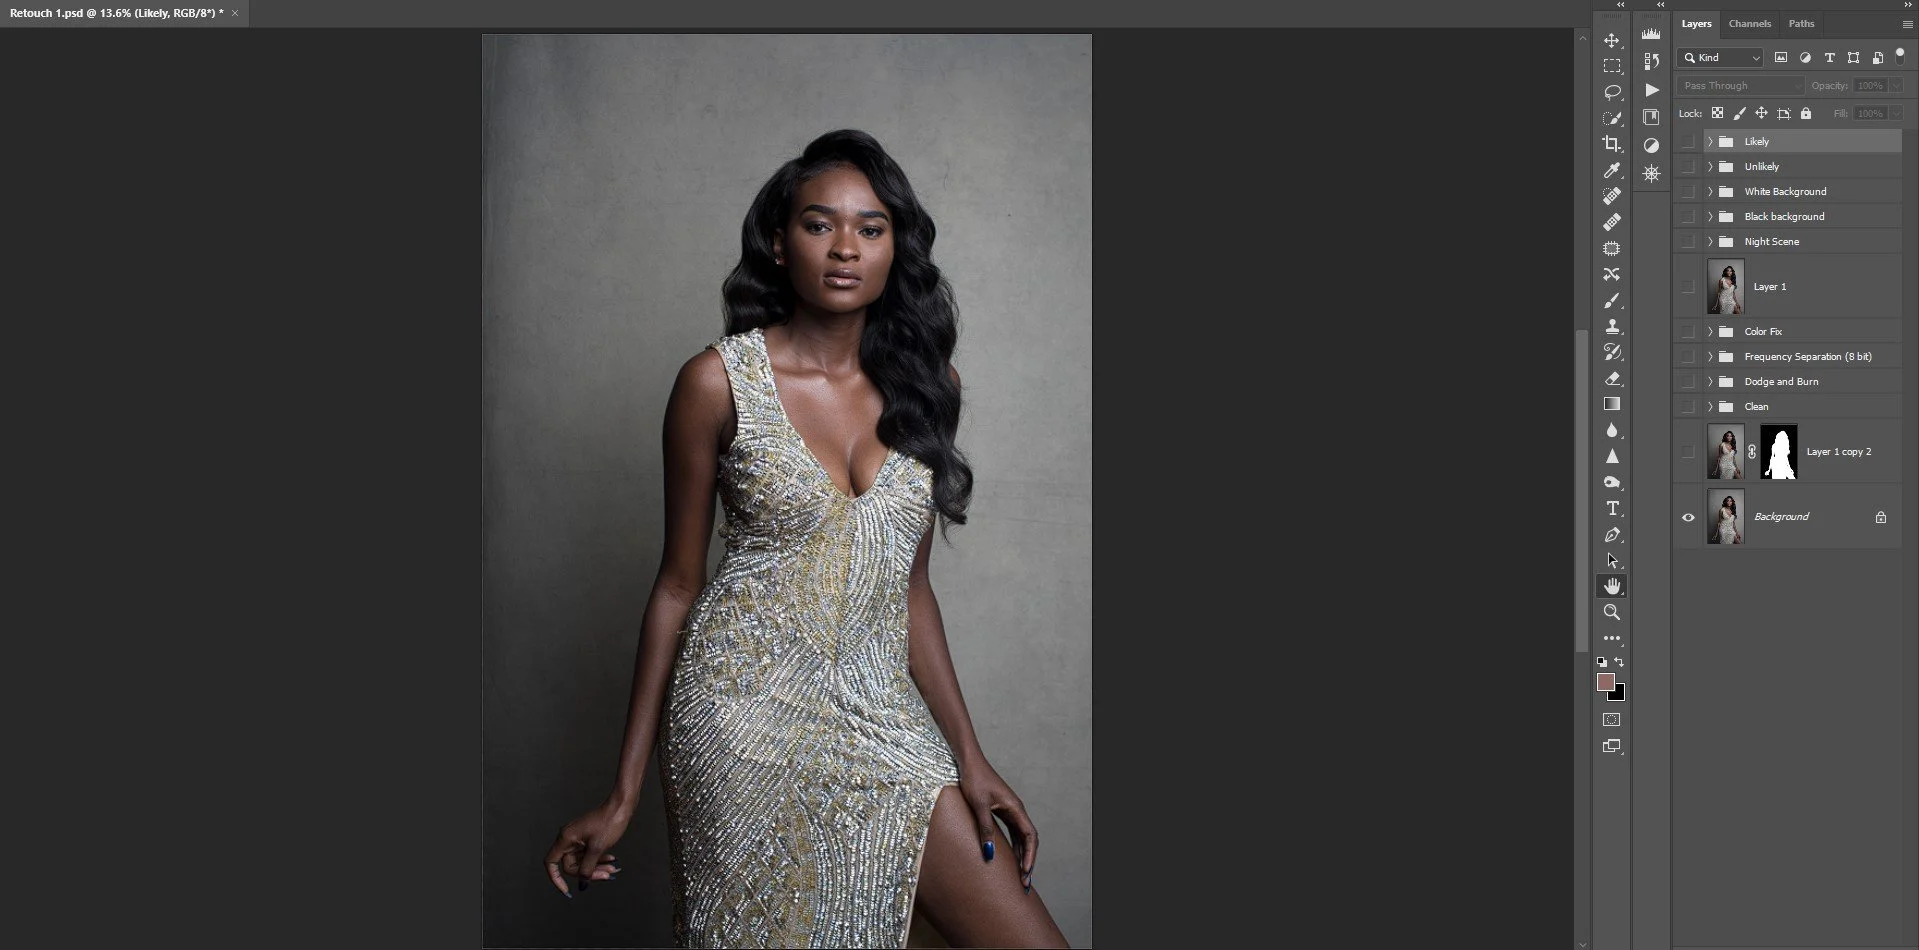
Original Raw file
l notice that the background has some marks and wrinkles. These are very minimal but the client may want them removed. In fact, the client may request to remove all the texture and patterns and make it a "plain" background without any distractions. While this isn't a genuine background replacement and more of cleanup, it still has the effect of completely changing the visual elements of the background.
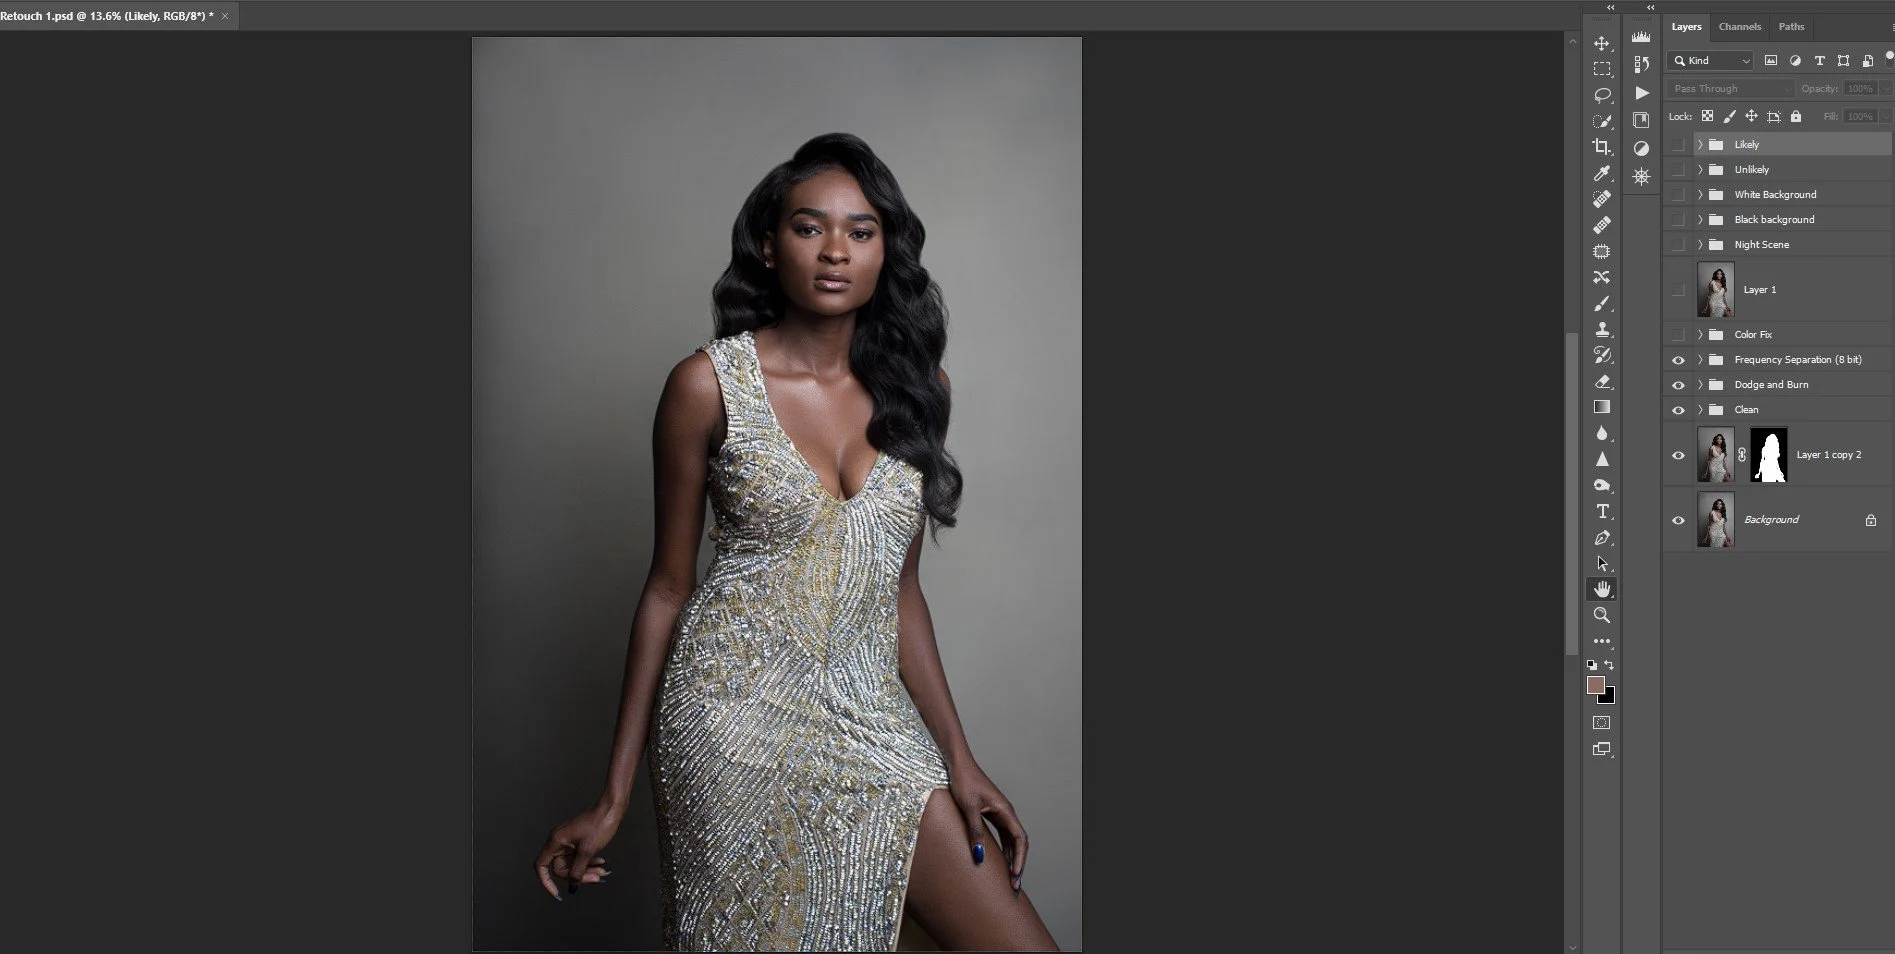
Retouched and background smoothed out
If you click to expand the image, you'll be able to see that all the texture has been removed but I've left the shadows and lighting pretty much intact. I didn't use any of the methods that I'd normally use in Photoshop to remove the background in my retouching workflow, just an assortment of brushes. So while I didn't technically replace the background, I did change it. The benefit of this is that it adds variety to multiple images when the same model is used against the same background: in some, you can leave the original details in place or opt to scrub them and even add variations to break up the monotony.
If you're interested in my retouching services, check out my Retouching page here on my website.
Let's move on to see some examples of different backgrounds, starting with solid colors like black and white.
Replacing a Background with a Solid Dark Color
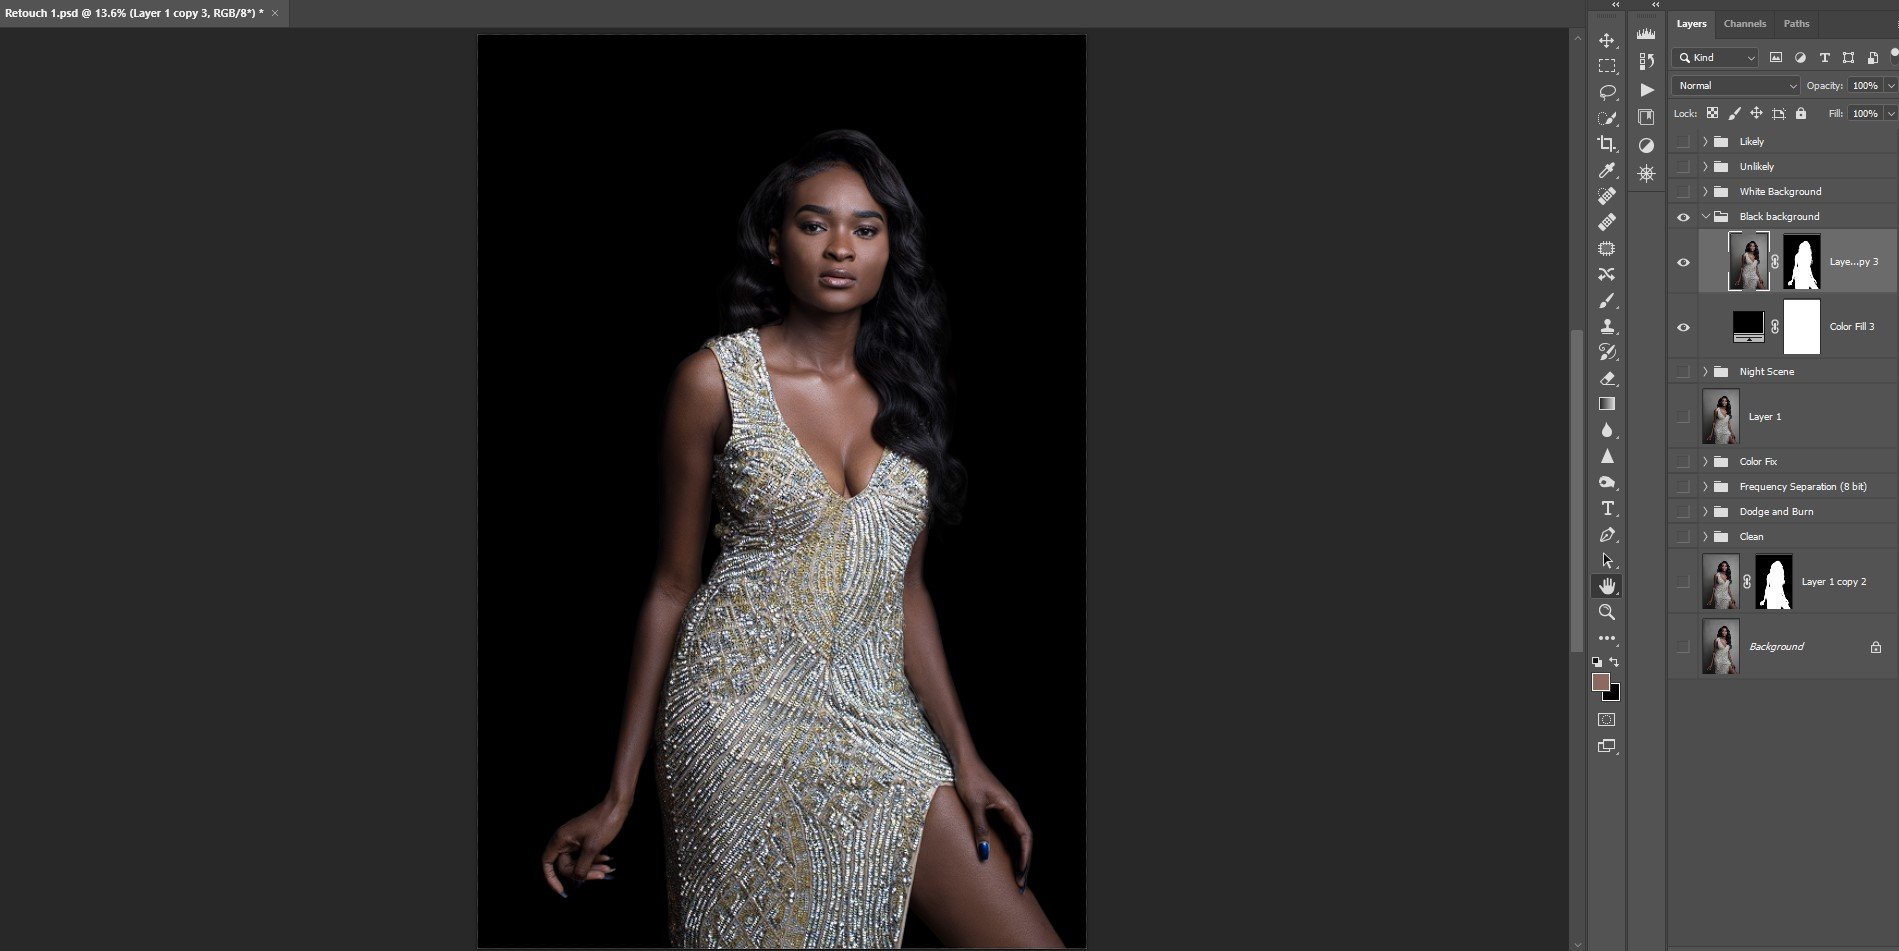
Solid black background
One common request that I get as a photo retoucher is to simply replace the background with a solid color, like black or white. These are typically the easiest requests to handle, as you can see from my layer stack. Basically, I made a selection in Photoshop and removed the background. Then I added a solid black color fill underneath it. The additional work is minimal but not represented readily in the image, which is the edgework I had to do going around the image and removing the haloing effect that sometimes happens with selections. Easy enough but vitally important so that your subject doesn't glow like some sort of supernatural apparition.
Replacing a Background with Solid White

Solid white background
Replacing backgrounds with a solid white background is probably most popular with product photography. But there are still times when a retoucher might be faced with using solid white or bright backgrounds in portraiture or other genres. I've used the same methodology as I'd done for the solid black background. The only difference is that the haloing effect may retain some of the original grays in some places or in minute crevices missed in the selection process. For this image, I had to adjust the mask to clean up a few small details that probably aren't noticeable to the casual viewer. All in all, about the same amount of work but probably less forgiving than using darker backgrounds.
Now, let's move on to the more tricky background replacements, starting with a night scene.
Replacing a Background with a Night Scene
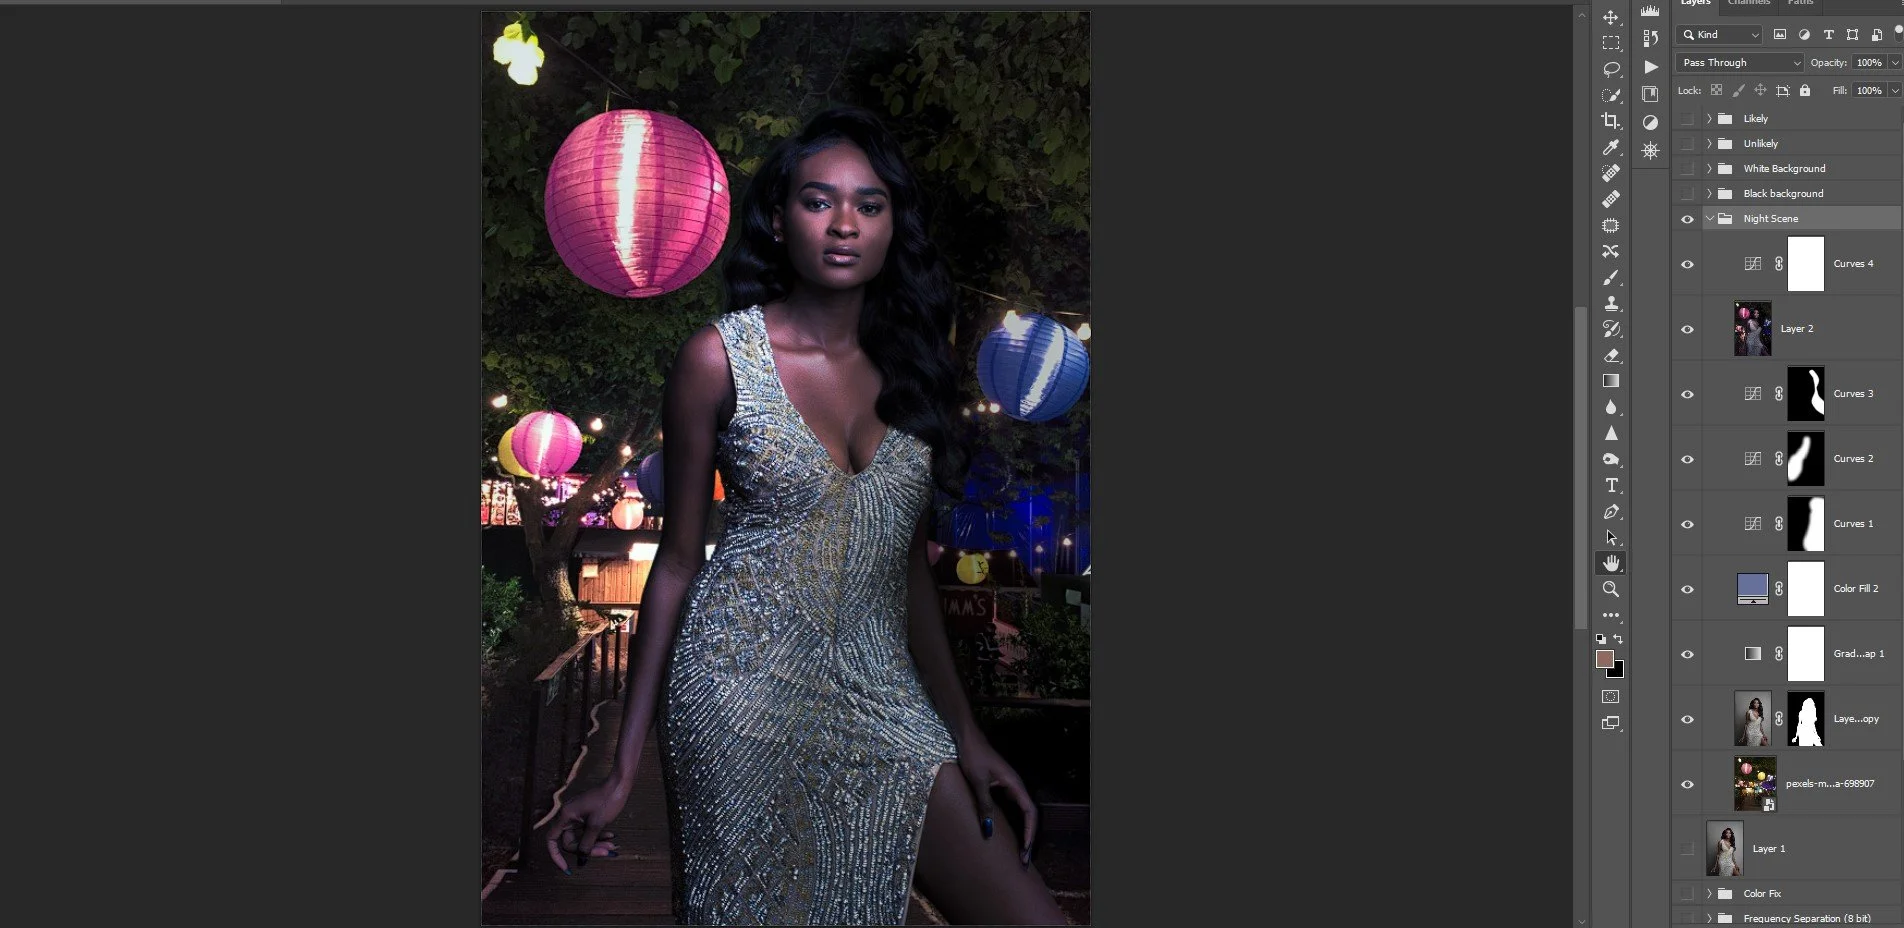
Night scene background
The real photo compositing work begins for a retoucher when the client requests that their shots have their backgrounds replaced with radically different scenes. At this point, one can't just cut and paste the model directly onto a new background and call it good. This is where the real work begins, as I already alluded to earlier.
As you can tell from the layer stack under 'night scene', I've done a few things to take into account exposure and color shifts. It's important that the model's skin is as closely matched to the background as possible. Note that I added some magenta and reds to emulate the light ball behind her. I also brightened her side closest to the main light source while darkening the right side of the image. I could have gone a step further and toned down the highlights on her skin but left that in since somebody had to pay for that effect in the studio, to begin with! Otherwise, dampening highlights that inform us of directional light can be removed or altered to fit the client's vision.
We'll move on with our last two examples.
Replacing Backgrounds with Unlikely Scenarios

An unlikely scene background
Nothing tests the retoucher's abilities more than inserting a model into an unlikely scenario, like in the above image. To my eyes, it's almost believable but not quite there. This is the challenge that happens when you place an unlikely subject, as a woman in a party dress, along a tranquil shoreline. You can see from my layer stack that I added quite a few adjustments, including a gradient map, to make the model at least blend in with the color scheme of the background. But it still looks like a copy-paste job. Why?
There could be several factors here, including the one of making the wrong decision about using a beach as a backdrop! But the client wants what he wants, right? So while I'd internally think that this is a terrible idea, I still have to make it as right as I can. But two other things I noticed too, which are always good things to check. The first is perspective or at least filling the frame to reduce the Field of Disbelief (FOD). That's a term I just coined! Anyway, in this second version, I increased the size of the model to bring her shoulders above the horizon line. Secondly, I added a subtle, tapered shadow behind her to make it look like she belongs to the sand.
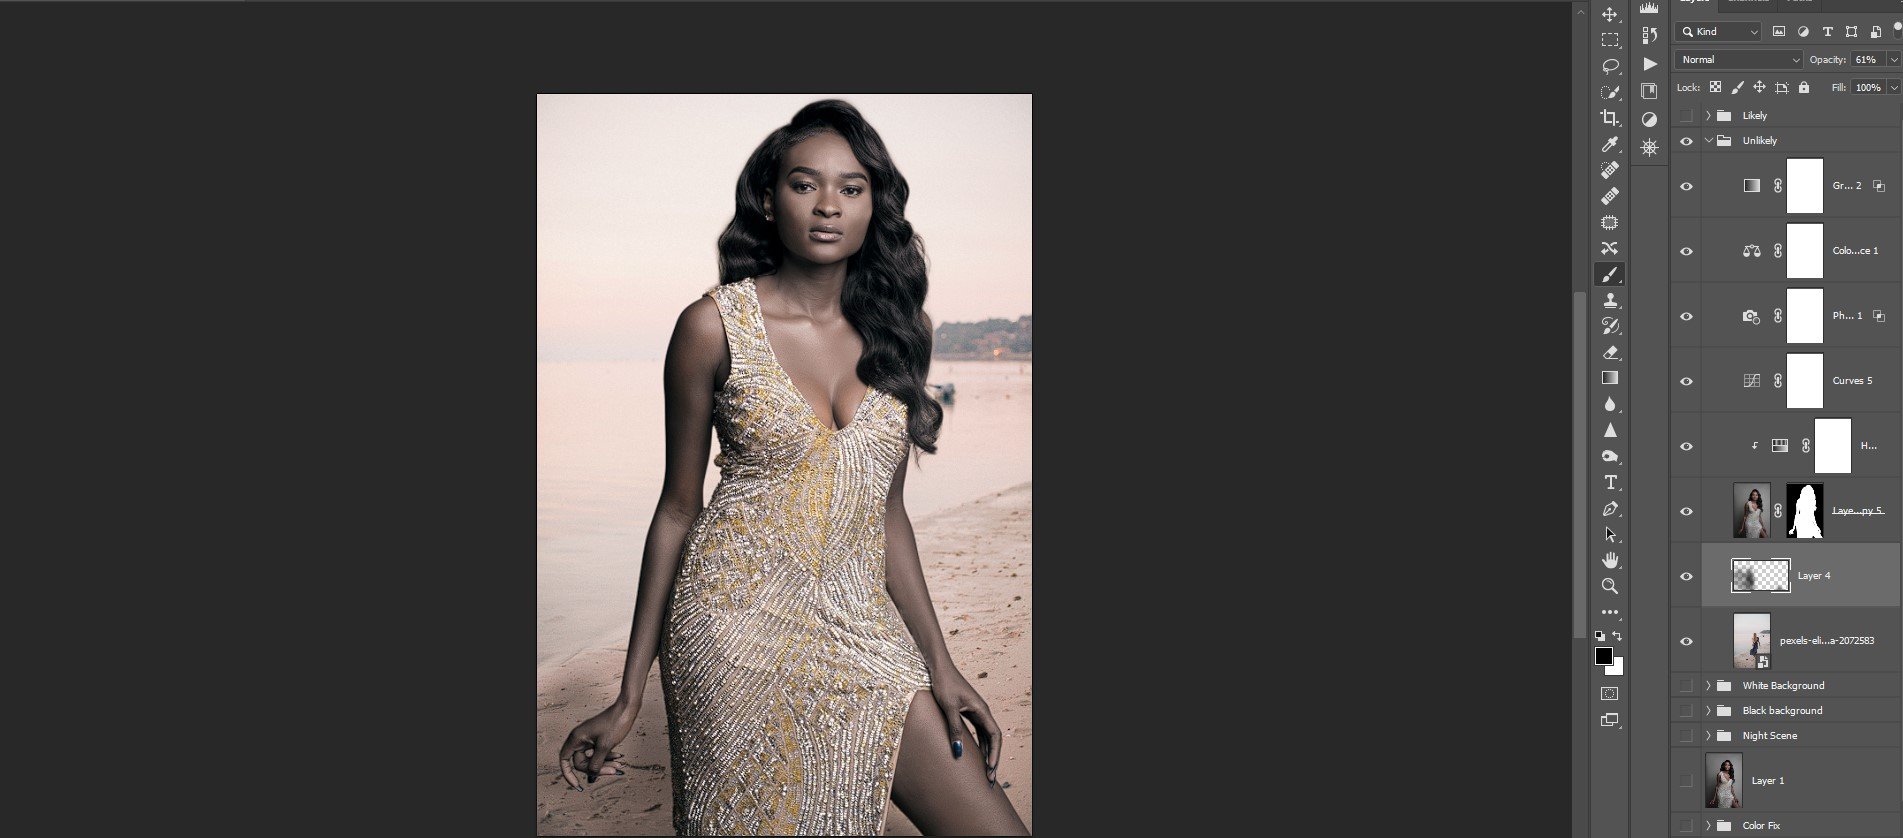
An unlikely scene background take 2
I don't know about you, but this version looks a lot more realistic in terms of the subject belonging to the background. Sure, the shadow can be sculpted and fine-tuned a lot more. I could even rework the lighting a little bit. But the problem then becomes, how much time do I really have to do a "quick background swap"? The sorry truth is, there's no such thing. For a retoucher to make this composite work to a high level of believability would require probably more time than it actually took to retouch the model, which didn't really take me that long since the makeup and lighting were almost perfect.
Backgrounds More Likely to Work
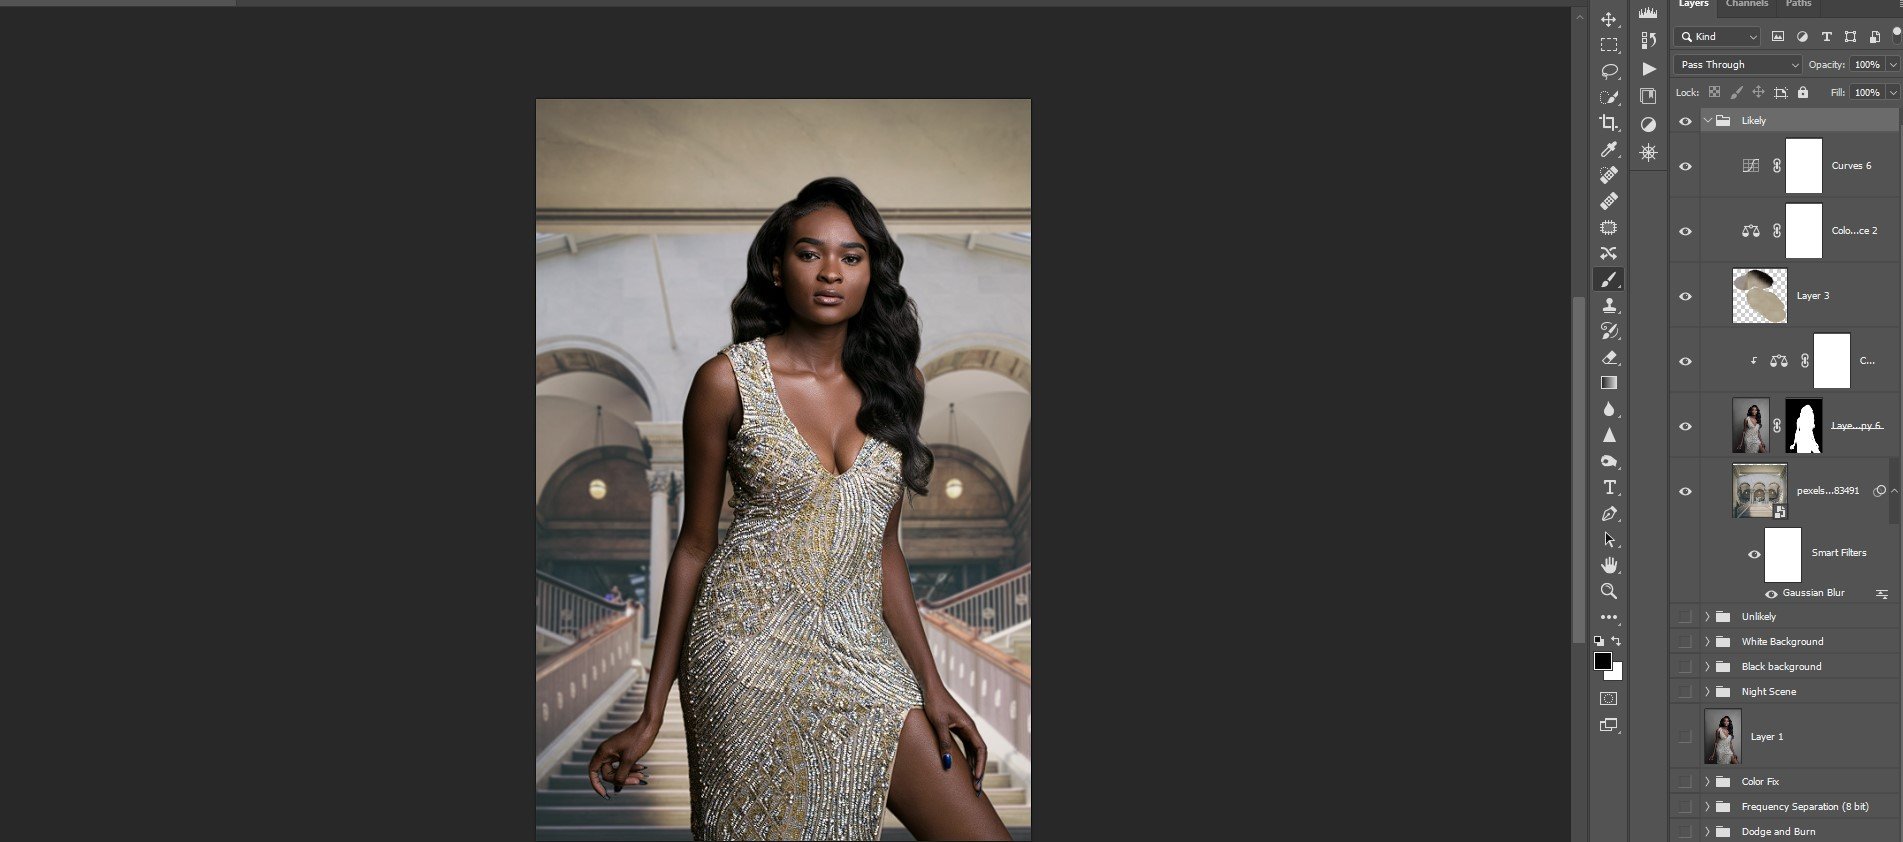
A more appropriate background
And then there are some backgrounds that just work. Matching a woman in a party dress with an interior background with some form of luxuriousness goes a long way in creating a believable background for a retoucher with little time to spend laboring over a composite. All I did here was blur the background image slightly, color-corrected the model to match the background along with the background to be more harmonious with the model's color scheme. This entire background swap took less than five minutes to throw together, compared to a lot more that I spent struggling with the beach version. Plus, I think I like this version the best of all of them, including the original background.
Herein lies the challenge for the retoucher, and it's almost always at least twofold. How fast can I find a suitable background, and how little time can I spend on the editing side? The goal should be, at least for me, to spend as little as five minutes on the editing when it comes to compositing backgrounds, what the uninitiated refer to as simply, "changing the background." And where to look? For free images that you can use for commercial purposes, sites like Unsplash and Pexels (millions of these sites are cropping up) are great places to start. Apart from the solid white and black backgrounds, which I easily conjured in Photoshop, the other backgrounds were sourced from Pexels, my preferred one-stop-shop for my background scrounging.